
Beginner’s Guide to Video Editing: What You Need to Know Before You Start
- Blog
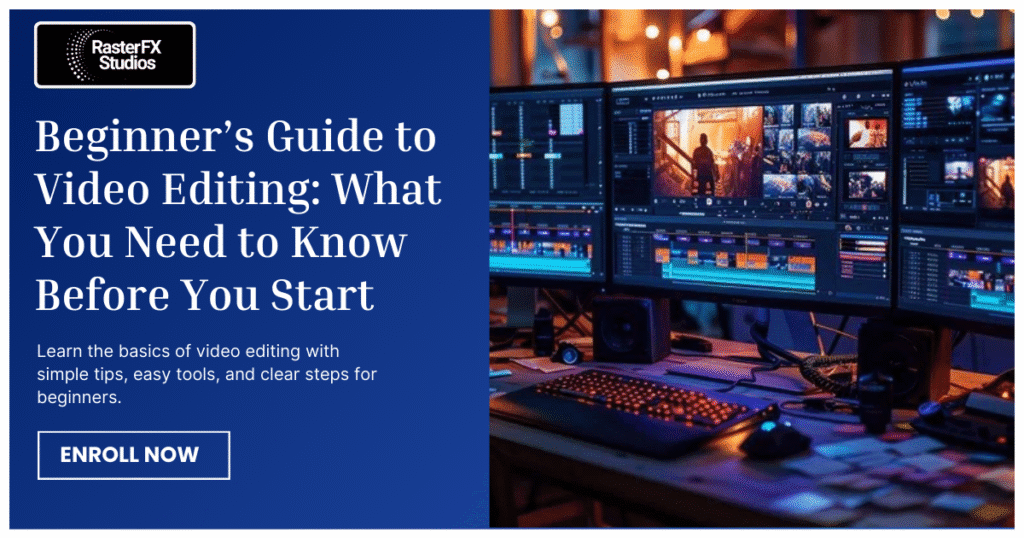
Beginner’s Guide To Video Editing: What You Need to Know Before You Start
- rasterfxstudios.com
Introduction
In today’s digital era, video editing is no longer reserved for professionals. Whether you’re a filmmaker, social media content creator, or someone looking to improve personal footage, video editing is a rewarding skill to develop. If you’re new to this, the process can be daunting. Where do you start? What tools should you use? What should you focus on first? This guide will introduce you to the essential concepts, tools, and techniques to get started and ensure you’re on the right path.
1. What is Video Editing, and Why Does It Matter?
Video editing is the process of piecing together video clips, audio, graphics, and effects to create a polished, engaging final product. The goal of editing is to shape the viewer’s experience, making the video not just a sequence of clips but a cohesive story. Through editing, you can create a mood, highlight key moments, and even influence how the audience interprets the content. Whether you’re editing a documentary, a music video, or a vlog, editing plays a critical role in delivering the message effectively.
2. Essential Video Editing Tools: Software and Hardware You Need
Before you start editing, you’ll need the right tools. As a beginner, you don’t need high-end gear, but having the right software and hardware will make your work much easier.
Hardware:
While you don’t need top-of-the-line equipment as a beginner, a few key components can make your editing process more efficient:
Processor (CPU): A multi-core processor (i5 or higher) speeds up video rendering and playback.
RAM: A minimum of 8GB of RAM is recommended, with 16GB being ideal for more complex editing projects.
Storage: Fast storage, such as an SSD or an external hard drive, will help manage large video files.
Graphics Card (GPU): While not essential for beginners, a dedicated GPU can speed up video rendering and playback for high-resolution footage.
3. Learning Basic Terminology in Video Editing
Understanding video editing terminology will help you navigate the editing process more effectively. Here are some key terms to know:
Timeline: The workspace where clips, audio, and effects are arranged in your editing software.
Cutting & Trimming: Cutting removes unwanted parts of clips, while trimming adjusts the start or end of a clip.
Transitions: Effects used to smoothly move from one clip to another.
Effects: Visual or audio enhancements applied to clips to alter their appearance or sound.
Rendering: The final step where the software processes all your edits into a single file.
4. Core Skills Every Beginner Video Editor Needs
There are a few fundamental skills every beginner should focus on learning:
Importing and Organizing Footage: Keeping your files organized in clearly labeled folders will save time and help you stay focused during the editing process.
Cutting and Splicing: Being able to remove unwanted clips and rearrange footage to create a coherent story is a must.
Basic Audio Editing: Properly balancing audio levels ensures clear dialogue and prevents background music from overwhelming the voiceovers or speeches.
Transitions and Effects: Experimenting with simple transitions (like fades) and basic effects (like brightness adjustments) will help enhance your videos.
5. Editing for Storytelling: Focus on Narrative
Editing isn’t just about technical skills; it’s also about telling a compelling story. Good editing enhances the narrative, creating a connection with the viewer. Here are some elements to focus on:
Pacing: The rhythm of your cuts affects the mood of the video. Fast cuts build excitement, while slower transitions can add emotional depth.
Continuity: Ensuring smooth transitions between shots and scenes avoids confusion and maintains a natural flow.
Emotion: Combining visuals, audio, and pacing effectively helps you evoke emotions and draw the viewer deeper into the story.
6. Common Mistakes Beginners Make in Video Editing
As you begin editing, there are several common mistakes you should try to avoid:
Overusing Effects: Too many flashy effects can overwhelm the viewer. Use them sparingly to avoid distracting from the main story.
Ignoring Audio: Poor audio quality can ruin an otherwise good video. Make sure the audio is balanced, clear, and crisp.
Disorganization: An untidy project can cause confusion and delay your progress. Keep everything organized from the start.
Not Saving Often: Video editing software can crash unexpectedly. Save your progress regularly to avoid losing your work.
7. How to Improve Your Skills: Practice Makes Perfect
Like any skill, the key to getting better at video editing is practice. Here’s how you can speed up your learning:
Edit Regularly: Work on personal projects to get hands-on experience. The more you practice, the faster you’ll improve.
Watch Tutorials: There are tons of free tutorials available online that can teach you new techniques and help you master editing tools.
Seek Feedback: Share your work with others to get constructive criticism. Feedback helps you identify areas for improvement.
Experiment: Don’t be afraid to try new styles or techniques. Experimentation helps you discover what works best for your editing style.
8. Final Thoughts: Your Video Editing Journey Has Just Begun
Starting in video editing may seem intimidating, but with practice and perseverance, it becomes easier and more enjoyable. Keep experimenting, learning, and refining your skills, and over time, you’ll develop a unique creative style. Editing is a skill that improves with time, so embrace the journey, and most importantly, have fun!
9. Understanding Video Formats and Resolutions
Choosing the right video format and resolution ensures that your video looks great across various platforms. Here’s a quick guide:
Popular Formats:
MP4: Most commonly used for online platforms due to its balance of quality and file size.
MOV & AVI: Higher quality formats, but they can result in larger file sizes.
WebM: Ideal for web-based content, especially on platforms like YouTube.
Common Resolutions:
1080p (Full HD): Standard for most online content.
4K: Ideal for professional-level content, but it requires more storage.
720p (HD): Lower quality but suitable for casual video production.
10. Frame Rate: The Importance of FPS (Frames Per Second)
Frame rate plays a crucial role in how your video looks and feels:
24 fps: Commonly used for cinematic looks.
30 fps: Standard for general video content.
60 fps: Best for high-action videos or smooth motion, particularly in gaming and sports.
11. Color Grading: Enhance Mood and Style
Color grading enhances the tone and mood of your video. After correcting the basic colors, you can apply creative color grading to affect how the viewer feels:
Cool tones (blue) evoke sadness, mystery, or calm.
Warm tones (orange or yellow) create a cozy, nostalgic feeling.
12. Motion Graphics: Adding Dynamic Visuals
Motion graphics add movement to static visuals. Basic animations, like titles, lower thirds, and logos, are great for beginners. As you get more comfortable, you can experiment with more complex graphics and transitions.
13. Planning Your Video: Storyboarding and Shot Lists
Before you start shooting, it’s important to plan your video. Storyboarding and creating shot lists help ensure you capture the necessary footage, saving time and effort during the editing phase.
14. Exporting Your Video: Platform-Specific Settings
When exporting your video, make sure to optimize it for the platform you’re uploading to. Each platform (YouTube, Instagram, etc.) has its own recommended settings for resolution, aspect ratio, and format.
15. Legal Considerations: Copyright and Fair Use
Respect copyright laws when using music, images, or other media in your videos. Always check the licensing terms, and use royalty-free or Creative Commons content to avoid legal issues.
16. Building a Portfolio
If you’re aiming for a career in video editing, start building a portfolio. Whether through personal projects, collaborations, or volunteer work, create content that showcases your editing skills. Platforms like YouTube and Vimeo are great for sharing your work.
17. Staying Inspired and Motivated
Video editing can be challenging, but staying inspired is key. Take breaks, watch other videos for inspiration, and join editing communities to receive feedback and stay motivated. Keep pushing yourself to improve, and always enjoy the process of creating!
18. The Power of B-Roll: Enhancing Your Storytelling
B-roll is an indispensable tool in video editing, offering an essential layer that elevates storytelling. Rather than simply filling space, B-roll enhances the narrative by providing important context, visual interest, and emotional depth. It brings variety to the visual composition and serves as a subtle guide for the viewer, reinforcing the primary message while enhancing engagement. When effectively used, B-roll enhances the pacing and tone of the story, maintaining the viewer’s attention and enriching the emotional experience. It offers the ability to smooth over transitions, highlight important points, and convey a sense of continuity that helps the viewer stay immersed in the content. It’s a powerful, non-verbal tool that can help to deliver a more polished and dynamic narrative.
19. Keyframing: Bringing Movement to Static Shots
footage. By setting specific points of change within a clip, such as starting and ending points, keyframes allow editors to animate elements like position, scale, and opacity over time. This provides control over how the visual elements evolve, enabling smooth transitions and adding visual interest. This technique is an essential tool for any editor looking to add life and fluidity to their video. Whether it’s subtle adjustments or more dramatic movements, keyframing allows editors to create polished animations and transitions. Through this method, even static shots can become vibrant, helping to maintain momentum and ensuring the video remains engaging and dynamic.
20. Slow Motion and Time-Lapse: Play with Time for Impact
Slow motion and time-lapse are two powerful techniques that manipulate the passage of time to evoke specific emotional responses. Slow motion draws attention to details that might otherwise be missed, heightening the drama of pivotal moments. By stretching time, this technique allows viewers to appreciate the intricacies of a scene, whether it’s a fleeting gesture or a significant event. Time-lapse, on the other hand, compresses long durations into short, fast-moving sequences, providing a sense of time passing quickly. This technique can illustrate processes, like construction, natural phenomena, or even the changing seasons, making it an excellent tool for capturing the essence of time and transforming mundane events into something visually compelling.
21. Aspect Ratios: Optimizing for Different Platforms
Aspect ratios are an essential consideration in video production, as they determine how the footage will appear across various devices and platforms. Different platforms often require specific aspect ratios to ensure the video is displayed correctly and optimally. Whether it’s for YouTube, Instagram, or TikTok, understanding these requirements is vital to maintaining a professional presentation. Ensuring your video fits the proper aspect ratio helps maintain composition and framing, avoiding unwanted cropping of critical visual elements. Whether you’re working with a standard 16:9 ratio for widescreen videos or a vertical 9:16 ratio for mobile-friendly formats, adapting your video to the right aspect ratio ensures the best viewing experience for your audience.
22. Utilizing LUTs (Look-Up Tables): Instant Color Grading Magic
LUTs (look-up tables) are powerful tools for quickly adjusting the color grading of your footage. They provide a simple way to apply sophisticated color corrections or creative effects, transforming the look of your video instantly. By altering the color profile, LUTs can evoke specific moods, enhance visuals, and create a consistent aesthetic throughout the video. Although LUTs are a quick solution for color grading, it’s important to ensure that the LUT complements the overall style and mood of the video. Each shot’s lighting and tone should be considered when applying LUTs, and fine-tuning may be necessary to maintain a natural and cohesive color palette across the project.
23. The Role of Music in Video Editing: Set the Mood
Music is one of the most influential elements in video editing, directly impacting how the audience emotionally connects with the content. A well-chosen soundtrack can enhance the atmosphere, intensify emotional moments, and support the pacing of the video. The right music can guide the viewer’s emotions, adding depth to the story and elevating the overall experience. Incorporating music effectively requires attention to rhythm, tempo, and genre, ensuring that it aligns with the tone and energy of the visuals. The music should complement the dialogue and visuals, never overpowering the spoken words but instead supporting and enhancing them. Finding the right balance between music, sound effects, and dialogue ensures the final product feels cohesive and emotionally resonant.
24. Creating Dynamic Intros and Outros
The intro and outro are crucial parts of the video structure, providing the opening and closing elements that bookend the content. A strong intro grabs attention immediately, setting the stage for the video’s theme and engaging the audience right from the start. Meanwhile, the outro offers a conclusion, encouraging further interaction such as subscriptions, likes, or exploring other content. Crafting an impactful intro involves establishing the tone of the video quickly and effectively, often incorporating branding elements like logos or taglines. The outro should feel like a natural wrap-up, providing closure while prompting the viewer to take action, whether that’s subscribing to the channel, watching another video, or following on social media.
25. Understanding Video Compression: Balancing Quality and File Size
Video compression is an essential aspect of the export process, allowing editors to reduce file sizes while retaining as much visual and audio quality as possible. Proper compression is necessary to ensure smooth playback and easy uploading, especially when dealing with platforms that impose file size limitations. However, striking the right balance is crucial excessive compression can degrade the quality of the footage, causing pixelation or blurriness.
Knowing how to compress your video without sacrificing clarity requires an understanding of the platform’s requirements and the best file formats for various uses. By adjusting compression settings appropriately, editors can optimize videos for smooth streaming and faster uploads, ensuring the video performs well across different devices and networks.
26. Building Your Editing Workflow: Efficiency is Key
A streamlined editing workflow can significantly improve productivity and reduce the stress of tight deadlines. Establishing an efficient process involves organizing assets, using templates, and utilizing keyboard shortcuts to speed up repetitive tasks. The more organized you are in your approach, the more time you can spend focusing on creativity and storytelling. Setting up an intuitive workflow starts with proper organization. This includes naming and categorizing files, creating backups, and setting up project templates for repeated tasks. Learning and using shortcuts in editing software can save hours of work. A well-established workflow allows for more creative freedom and faster turnaround, helping to meet deadlines without sacrificing quality.
27. Networking and Collaboration: The Power of Working with Others
Networking and collaboration are essential for growing in the video editing field. Building relationships with other creatives opens up new opportunities for learning and growth, whether through direct partnerships or by sharing knowledge and feedback. Collaboration not only enhances your skills but also broadens your exposure to different styles, techniques, and industries.